Sunday, January 11, 2015

Whole Wheat Lemon Ginger Cookies

" Winter = More Tea/Coffee = More Cookies = Warmth = Lemon Ginger Cookies "


These cookies were a hit in my house as well as among friends who got to taste them :) 
They are so yummy that will make your tummy always have some space for these !!!

Ingredients

    • 1 cup all-purpose flour, spooned and leveled
    • 2 tablespoons finely chopped crystallized ginger (about 1 ounce)
    • 1 tablespoon finely grated lemon zest
    • 1/4 teaspoon baking soda
    • 1/2 cup (1 stick) unsalted butter, room temperature
    • 1/4 cup granulated sugar
    • 1/4 cup packed light-brown sugar
    • 1/2 teaspoon pure vanilla extract
    • 1 egg yolk, room temperature

Method

  • Preheat oven to 350 degrees, with racks in upper and lower thirds. In a medium bowl, whisk together flour, ginger, lemon zest, and baking soda. In a large bowl, using an electric mixer, beat butter, granulated and brown sugars, vanilla, and egg yolk on medium until fluffy, about 8 minutes, scraping down bowl as needed. With mixer on low, gradually add flour mixture and beat just until combined.
  • Place coarse sugar in a small bowl. Roll rounded teaspoons of dough into balls. Place, 2 inches apart, on two parchment-lined rimmed baking sheets. Bake until edges are slightly brown, 14 minutes, rotating sheets halfway through. 

Enjoy them anytime :)If you make them please share your experiences.

Saturday, June 1, 2013

Perfect Frosting !!!

Perfect Frosting and a perfect quick recipe - Believe me....


Ingredients:

2lb 10x Powdered Sugar - i got Dominos
1 cup Vegetable Shortening - i got Crisco
1/4 cup water, if required 2 tbspns more

Directions:

1] Sieve the powdered sugar to remove all the lumps and keep in a separate bowl
2] Beat the vegetable shortening at medium speed for 3-5 mins till it becomes light, creamy and shiny
3] Mix water and powdered sugar and mix well with spatula
4] Once mixed well, beat the mixture for 5 mins on high speed till you get a nice glaze and peaks in the frosting as seen in the pic
5] Frosting is ready with medium to stiff consistency which can be used to make borders and flowers. If you want to use this frosting to ice the cake or cupcake then add little water till you get thin consistency.

Your Frosting is ready in less than 10 mins.

Types of Consistency:
Stiff consistency Icing/Frosting -
Stiff icing is used for decorations such as flowers ,figure piping and stringwork. If icing is not stiff enough, flower petals will droop. If icing cracks when piped out, icing is probably too stiff. 

Medium consistency Icing / Frosting -
Medium icing is used for decorations such as stars, borders and flowers with flat petals. If the icing is too stiff or too thin, you will not get the uniformity that characterizes these decorations. Medium to thin icing is used for icing your cake. Add water or milk to your icing recipe to achieve the correct consistency.

Thin consistency Icing / Frosting -
Thin icing is used for decorations such as printing and writing, vines and leaves.

Now make your cake or cupcakes and this super easy frosting and let the creativity begin....
Have fun!
Richa


Friday, May 24, 2013

Hula Coola .... to cool you off this Summer !

A perfect drink for Summer - Make it for potlucks, Happy Hours, Parties or simply for yourself to pamper :)


Ingredients

1/3 cup sweetened cream of coconut - if you don't find cream of coconut just add Coconut milk
1 fresh ripe Pineapple
1 tablespoon fresh lemon juice
1 cup ice cubes
few sprigs of Mint
1/2 cup of Sweetened Shredded Coconut flakes
Salt - optional

Directions

Put cream of coconut, pineapple, lemon juice, mint, shredded coconut and ice into the pitcher of a blender, and blend for 15 seconds on high speed. Stir ingredients. Blend for 15 seconds more on high speed.

Pour and serve topped with some shredded coconut and mint leaves - tastes refreshing, amazing and yummm!!
Enjoy and get compliments....
Richa


Sunday, August 19, 2012

Chicken Kathi Roll

 I made this recipe keeping Meeta's Monthly Mingle in mind and also was missing Indian Street Food.....
Its a super simple recipe - it has lot of steps but they are pretty simple... and tastes amazing!!! You can modify this recipe in terms of Marinade the way you like or just keep it the way i mentioned... it will surely make you want more ... I omitted the Mint Chutney for one Roll as my friend doesnt like Mint flavor and she loved it ..... Just one thing is important - Enjoy ...


Ingredients
for Chicken Marinade
3 Chicken Breasts - cut into small pieces
2 tspns Tandoori Chicken Tikka Masala
1/2 tspn Red Chilli Powder
1-2 tspn Ginger-Garlic paste
1/2 tspn Chat Masala
Salt as per taste

For Kathi Roll Stuffing
1 Green Pepper - Chopped
1 Red Onion - Chopped
1 tbspn Oil

for assembling Kathi Roll
6 Indian Flatbreads (Roti / Chapatis)
1 tbspn Butter
6 tspns Mint Chutney

Directions:
1] In a bowl, mix all the ingredients for Chicken Marinade and keep it aside for atleast 1 hr
2] Preheat Oven at 350 degrees F, Bake the chicken for 12-15 mins
3] Turn the Oven to Broil which is at 500 degrees F and let the Chicken broil till you get a nice crust on it.
4] In a heated pan, add Oil, when heated add the Onion and bell pepper and saute for a while till Onions are cooked.
5] Add Broiled Chicken to this and saute for atleast 5 mins till it starts sticking to the pan. This will give nice blackened effect to the chicken.
6] Heat a flat pan / tava. Apply butter to Flatbread / Roti and put on tava and let it cook till it turns slightly brown.
7] Repeat this for all 6 Rotis
8] Apply Mint Chutney to all the Rotis/Flatbreads. Put Chicken Stuffing in the center and fold the roti and close it with a toothpick. Repeat for all the 6 Rotis.
9] Broil the Kathi Rolls for 1 min - Dont keep the Tray of Kathi Rolls too close to the coil to avoid burning.

Now just Enjoy this wholesome meal :)

Richa

Wednesday, May 9, 2012


Cookies ~ everybody loves them in some form or the other.... I had a lunch invite by one of my dear friend who happens to be my next door neighbor as well and i was wondering what should i bake as i had very little time. Addition to this my lil one was asking me about cookies since last 2 days.... and it clicked me.. Cookie pops for a friend and cookies for kids - there is a saying in Hindi "ek teer mein do nishaane" which means you hit 2 targets with one arrow.

So i finally decided let the cookie be simple and accessories be fancy which will make it special :)
People always ask me this question - do you plan your baking or you just do it when thought comes? How come you always have inventory up to date when it comes to baking ? Well to answer this - I always keep my baking ingredient list stocked !!! and sometimes my baking is planned and sometimes just when i feel like :) Sometimes i even bake when i think i have sometime ..... day by day its becoming a passion for me and i'm loving it !!! Whenever i bake i get this feeling of satisfaction and feeling of i did something on my own and others liked it..... sometimes i feel i'm going crazy to feel this way...but Baking gives me relaxation .... it doesnt bother me in anyway ......

OK back to where i was :P so i made the Sugar cookie dough and with 1/4th dough i made Cookie pops and rest of it i added some colorful sprinkles in the dough and made cookies using circle and heart shaped cookie cutter...End result - it was awesome !!! 

They are simple, sweet and you can make so many things out of them - just use your creativity.


Ingredients

4 cups sifted all-purpose flour, plus more for surface
1 teaspoon baking powder
1/2 teaspoon salt
8 ounces (2 sticks) unsalted butter, softened
2 cups sugar
2 large eggs
2 teaspoons pure vanilla extract


Directions


  1. Sift flour, baking powder, and salt into a bowl. Cream butter and sugar with a mixer until pale and fluffy. Reduce speed to medium; add eggs and vanilla. Reduce speed to low; add flour mixture gradually, beating until incorporated. Shape dough into 2 disks. Wrap each in plastic and refrigerate until firm, at least 1 hour or overnight.
  2. Preheat oven to 325 degrees. Let 1 disk of dough stand at room temperature until just soft enough to roll, about 10 minutes. Roll out dough on a lightly floured surface to 1/4- to 1/2-inch thickness. Cut out shapes using cookie cutter. Transfer to baking sheets 2 inches  apart. Gently press cookies down. (Cookies will stick once they are baked.) Roll out scraps once, and repeat. Repeat with remaining disk of dough. Freeze until cookies are firm, 15 minutes.
  3. Bake in batches, switching and rotating sheets halfway through, until edges of cookies turn golden, 15 to 18 minutes. Let cool on sheets on wire racks.
  4. For Cookie pops - fill the dough in the cookie pan, press the pop stick firmly. Bake for 15 to 18 minutes till they turn golden. Remove and cool them on the wire racks. Decorate with Royal Icing or Ganache. I used Ganache and some sprinkles on top.


Enjoy these with almost anything and anytime during the day.

Richa

Posted on by Richa Kulkarni | 2 comments

Tuesday, April 17, 2012

Flashback !!!

Hello All... its been a while i haven't updated this blog due to mainly 2 reasons-

1] My parents were visiting me here in USA for the very first time
2] I moved into a new apartment

But that doesn't mean i didn't bake...rather i baked a lot.... tried lot of things... below are the pics..i'm wondering which recipes should i post.. Can you all help me - which ones would you like to see?

Orange-Cranberry Cookies

Chocolate cake with Chocolate Ganache


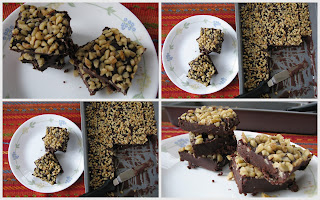
Homemade Chocolate bars


Banana cupcakes

Chocolate Wine cake for my Birthday


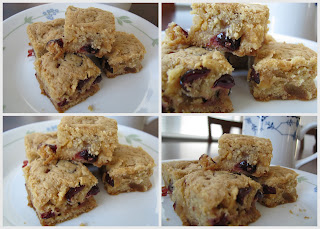
Cranberry Blondies


Ginger Cookies

Chocolate Linzer cookies with sugar-free Raspberry filling


Chocolate cake with whipped cream strawberry filling


Valentine's Day gifts for my friends


Earl Grey Chocolate Cake

Dark Chocolate Coconut Blondies


Vanilla Cake with Whipped cream strawberry filling Cake


Chocolate Cupcakes for St. Patrick's Day!


Isn't it a big list :P
Hope you liked all of them ..... I will try to put recipes for most of them but i would love to hear the top ones so i include them first....

C ya!!!
Richa

Wednesday, October 12, 2011

Tomato Tart

Baking Tart was on my To-Bake-List since quite a long time and i finally ordered a Tart pan on Amazon and i was all set to make my very first Tart and as usual my guinea pig was my family and some friends....and the Test results were successful and the Tart was a hit !!!

It had a nice crusty crust with well done filling and nothing was burnt - Aditya said "it has a right blend of spices" and everything was just so right it.....


Ingredients

1 tbspn chopped garlic
3 tablespoons olive oil
All-purpose flour, for dusting
1/2 recipe of Pie Dough
1 cup ounces Ricotta cheese
1 1/2 pounds firm but ripe tomatoes (4 medium), cored and sliced 1/4 inch thick
Coarse salt and freshly ground pepper
Shredded cheese for topping
Italian seasoning (optional)

Directions


  1. Preheat oven to 350 degrees. 
  2. On a lightly floured surface, roll out dough to a 1/8-inch-thick circle, about 12 inches in diameter. With a dry pastry brush, brush off the excess flour; roll the dough around the rolling pin, and lift it over a 10-inch tart pan with a removable bottom. Line the pan with the dough, pressing it into the corners. Trim the dough so that it is flush with the edges; transfer to the refrigerator to chill, about 30 minutes.
  3. Spread garlic evenly on the chilled crust. Sprinkle with half of the Ricotta cheese. Arrange the tomatoes on top of the Ricotta cheese, in an overlapping circular pattern. Season with salt, seasoning and pepper. Sprinkle with remaining Ricotta cheese, and drizzle with remaining 2 tablespoons oil and Shredded cheese. Transfer to oven. 
  4. Reduce temperature to 400 degrees. and bake until crust is golden and tomatoes are soft but still retain their shape, 45 to 55 minutes. Transfer to wire rack to cool for 20 minutes, and serve warm.